Showing posts with label Art. Show all posts

Thursday, 14 August 2014

Trip Up Town

Though I live in London, I don't often get to see 'the sights,' so last week my friend Grace and I took a trip Up Town to take photographs and enjoy the general atmosphere of a city summer. Its an interesting mix of people who work here and have a destination to get to, and those who are following a more relaxed sightseeing pace. Street dancers, artists and musicians add to the mix, as well as the contrasts of old and new archetecture. I enjoyed myself so much, that I'm going to try and take you on a tour through our photographs and words.

The view of the London Eye from the rather crowded Westminster Bridge.

'Big Ben' is a nickname for this iconic and ornate clock tower and is actually the name of the biggest bell inside it.

This area is full of monuments like this one which remembers the service of those who gave their lives for the freedom of our country.

Walking on to Trafalgar Square you see the Blue Chicken, a recent, quirky, and fun art installation.

These street dancers attracted a large crowd outside the National Portrait Gallery. For this photo I held the camera above my head and hoped it would turn out ok!

These street artist were completing the flags of many nations, and people would put a few coins onto their flag.

This is Trafalgar Square. This picture beautiful architecture, dazzling fountains and many sightseers, but I think it also gives an idea of the lovely atmosphere in the square.

 Perspective from outside the National Portrait Gallery looking down onto Trafalgar Square.

One of the many brightly coloured stalls at Covent Garden Market, just a few streets away.


We saw this cute cute truck in Covent Garden, Milo & Hectors Tremendous Ice Cream Sandwiches. I love the colours.

This guy was dressed up as the Mad Hatter from Alice in Wonderland, with a tea party set up and a real doormouse in his teacup! 

To me this picture really captures the brightness and energy of London streets in summer.

Back in Trafalgar Square in the dazzling sunlight. Here I was playing around with manual focus on my camera.

A mounted guard on the famous Horse Guards Parade. I didn't realise the light had come out that way until later, but I like the effect it gives.

This statue on Whitehall remembers the service of the women during World War II, because although they didn't fight, they drove ambulances, worked in factories and supported the troops in many other ways for the war effort. It's such a beautiful monument.

Wednesday, 7 May 2014

Recent Artworks

For the last week I've been doing a lot of blog-worthy things, but I haven't put anything up on the blog. I have about six half-finished drafts because I haven't properly finished any of them before I go onto something else! So before I get back to photographing, sewing and recipe testing, today I thought I'd share some of the art work that I've been doing recently.

I am blessed to have a really good art teacher, and at the moment we are doing a mini project on drawing. In our lesson I tried doing a still life with books and a model boat using sketching pencils, and I was pleased with the way it turned out. (The writing in the corner were my notes from the lesson: Pencil drawing 1. Measure, 2. Outline → shapes → form, 3. Details → lines → shade.)


For my first time using drawing pens for an observational drawing, I chose to sketch the books from the first picture. I was quite nervous at first, but as I gained confidence I got better. I'm exited to try some more pen drawings now!


Our homework was just to practice drawing, so every morning before I start work I sketch something, either from a photo, still life, or an idea in my head. This is my favourite so far.


Faith, my teacher, has a website: http://artwithfaith.weebly.com. If you are thinking of art lessons, check the website out. She is a really good teacher, very patient and encouraging. She teaches the principles of art and introduces new techniques and helps you to think critically about artworks. Look out for some of my pictures in the gallery! 

Monday, 10 February 2014

Bible Posters 5: John 3:16

One of the things I love to design are posters of bible verses. I have been working on creating digital copies of some of these lately. As the first series on my blog, I am going to show these, one at a time, on Sundays (yes, today it's late!) on the blog. I hope you like them. At the moment I want all my posters to stay here on my blog, so I have labeled them with my blog address. 


I saw this idea on Pinterest where someone had written out John 3:16 and marked out the letters of the word valentine. This was interesting to me as I thought about how the verse about God's love could be related to valentine's day, which is about our love for others.  God's love is far a greater, deeper, and truer love than any emotion a human can feel. We cannot fully understand his love, but we can see it evidenced in our lives and in all the world around us. In no way is this love better demonstrated than on the cross, where he sacrificed Jesus for us. Our love is often based on selfishness, but God's love is demonstrated in an act of amazing selflessness- he died for us! And as the verse says, this love brings life to us, because it frees us from sin. If Valentine's day is about celebrating love, what better love do we have to celebrate than His?

I made these posters using picmonkey.com free photo editing, adding text to a background found online. I used several effects and couldn't choose which I like best! Which one do you prefer?

Monday, 3 February 2014

Valentine's Wax Resist Card


So many of the valentine's card designs I've seen around the web are very simple designs and I've been wondering if I could create something similar. The card I came up with only took about 5 minutes to create from start to finish and it was super easy too! Try making your own card with a unique design to give to someone you love next week!

Supplies needed:
•   Blank white greeting card
•   Drawing pencil and rubber
•   Wax crayons
•   Watercolour paint
All you need to do is be able to create a design using words and/or pictures and copy it onto your card in pencil. Draw your own design in rough a few times first so that you can tweak it until you are happy with it. If you're having a hard time with this you could find a design and copy it.


Rub out the design so only the faintest lines are showing as a guide for the next step, where you will draw over it.


Test out your crayons on a piece of paper and then cover with a thin wash of paint. If the paint comes away from the crayon. Wax crayons and watercolour paints are the things to use. Trace over the design in your crayons.


Cover the design with a thin wash of watercolour paint in a complimentary colour. Leave to dry with the corners weighted down to stop the card drying out of shape.

Saturday, 1 February 2014

Happy February!

Happy February to all blog readers and I hope you're looking forward to this month! This month I'm hoping to move into more art, craft, and sewing related posts and what a better month to start than the month of love! And because Valentines is on the 14th, and this is 14 things,  I've created an inspiration board with fourteen items from around the web to kick-start creativity. Check out for craft and card-making ideas, sewing tutorials, recipes, gifts ideas, and something for the home too!


Art:
Love One Another Art Print valentines art prints from jdc to brighten your home- jonesdesigncompany.com

Craft:
Valentine's Day School Lunch Notes free printable love notes- chickabug.com
(Check out their valentines store for more gorgeous printables!)

Card-Making:
Valentine's Wax Resist Card tutorial on my blog- 14-things.blogspot.co.uk

Fashion:
Butterfly Printed Silk Scarf any one of these beautiful silk scarves would make a lovely gift- uk.monsoon.co.uk

Food:
Rhubarb and Ginger Breakfast Muffins a delicious breakfast recipe for the 14th, or any day this month- keziacooks.blogspot.co.uk

Chocolate French Toast make your own chocolate chip artisan bread- simplysogood.com
and top with cream and strawberries- myweirdlifeunderarock.blogspot.co.uk

Valentine's Oreo Pops step-by-step photographic instructions for how to make these sweet treats- lilluna.com

Whale You Be My Valentine? whale cookie recipe and free printable treat bag labels- bakerella.com

Gifts:
Lip Gloss how to make lip gloss yourself- joythebaker.com

Knitted Hearts download this pattern for free and knit up some super cute and soft hearts- magpiepatterns.com

Home:
Floral Love Cushion
a beautiful cushion available in three colours- dotcomgiftshop.com

Sewing:
Heart-Shaped Pot Holders a charmingly cute pattern with instructions- marthastewart.com

Love Note Valentine's Day Bunting free tutorial on how to sew 14 pouches, each with a love note, for each day leading up to valentines-  lilluna.com

Love Birds embroidery pattern by polka and bloom- magpiepatterns.com

Friday, 1 November 2013

Embroidery {Psalm 106 vs 1}


During November I am trying to write a novel! Crazy, I know, but it was NaNoWriMo young writer's program that inspired me to do it. Because I am now going to be writing like crazy, I will not be able to post so regularly, so I'm starting off with some projects I've completed earlier and saved for a times like now! : )
I finished this embroidery in time for Mother's Day earlier this year as a gift to my mum. I really liked doing the embroidery, but like most of my gifts, it was a bit of a stretch to get it done in time! I worked on this watching a movie, at a friends house, and at any spare moment I got in my room. 

I can't remember why I picked this particular verse, probably just because I liked the words. It mentions the Lord in every line, and also his goodness and mercy. I hope it is reminder to praise the Lord and give Him thanks to everyone who sees it in our living room! My mum chose this nice frame, the glass of it measures 7.5" x 9.5" to fit the  fabric.


I chose a large piece of thick white cotton and used embroidery thread for everything except the tree, merely because I had no green embroidery thread! Using an ordinary (HB) pencil I lightly sketched the design onto the fabric after practicing a few times on paper. I started with the tree outline, then the words, and finished with the flowers at the bottom and the tree trunk detail. It is all done in running stitch, where a would sew around the word or an individual letter once, then go back and fill in the gaps. I used two or three strands of the thread and an embroidery needle. I put the fabric onto an embroidery hoop to make it easier to work with. I filled the tree top with simple (almost) straight lines of running stitch.  I'm sure there are many other stitch techniques that could work, I'm not saying this is definitely the way to do it! 


Here is the back, not very pretty, but I just wanted to show how I folded the edges in (to neaten the front and make it fit in the frame,) and then iron over interfacing to help it keep the right shape. It's really hard not to have a few wrinkles though! 

Sunday, 13 October 2013

Bible Posters 4: Grace and Peace

One of the things I love to design are posters of bible verses. I have been working on creating digital copies of some of these lately. As the first series on my blog, I am going to show these, one at a time, on Sundays on the blog. I hope you like them. At the moment I want all my posters to stay here on my blog, so I have labeled them with my blog address. 


Grace and Peace
'Grace to you and peace from God our Father and the Lord Jesus Christ.' This verse and the many others like it give us a wonderful message about God and his love for his children. God's grace is shown to us through all the gifts he gives us, primarily Jesus and his death for us and the forgiveness of our sins through him. We stand in God's grace {Romans 5:2.} We can have peace in our hearts when we are forgiven of our sins and have peace with God, through Jesus who has made it possible for God to forgive us. 

I had the inspiration for this poster quite a while ago when I was in church and quickly wrote it down. I have heard the greeting 'Grace to you and peace' so many times at the beginning of the New Testament letters to the churches. I wondered if I could find the grace and peace greeting line of every letter and write them down in two columns, thinking of newspaper columns. When I got round to making this poster I wondered what I could do for the papery background I wanted. I considered looking around the web for a papery background or maybe try to create one on illustrator. The paper background you see on the poster was just a photo I took of some crumpled-up paper, and I was surprised how well that worked! Next I sought out the verses to add to the paper, and then the final 'Grace and Peace' text.

Thursday, 26 September 2013

I ♥ Orla Keily Designs

Last week I had a mini art project on the go where I had to choose an artist to study. Out of the list of names given, I was immediately drawn to researching Orla Keily. And the more I looked at the items online, the more I liked them! Here is some of what I wrote:
Orla Kiely is an Irish fashion designer based in London. She has a shop in Covent Garden, and exports to Europe, America and Asia.
Orla received a Master’s degree from the Royal College of Art where Harrods purchased her exit collection. Although she started work on hat design, she moved into design work on handbags with the new idea of using laminated cloth.
She worked with a lot of different companies before setting up her own business. Her designs are now featured on a variety of items, including a car and water bottle! The Orla Kiely brand produces ready-to-wear collections, homeware, furnishings, luggage and accessories, all emblazoned with her instantly recognisable graphics. The clothing and bag designs feature in London Fashion Week.
Her signatures are “Colour, pattern and texture with a 60s twist.” Her designs are graphic and bold. She has desgined coats, knitwear, skirts and dresses in striking arrangements. One of the key fabrics has perfect rounded flowers sewn on top. Her signature patterns are ‘Stem’ which has teardrop leaves coming out of a stem, ‘Acorn’ which has leaves with ‘acorns’ interlocking, flowers, and pears in different patterns.
I created a collage of some of my favourite items designed to show the variety that the shop offers. If you like these, look on the Orla Kiely website. I have also linked to items stocked on the John Lewis website. If you click on the picture you will be taken to the webpage.


Squirrel Intarsia Sweater Light Grey

Squirrel Intarsia Sweater

Buy Orla Kiely Printed Tote Handbag, Linear Stem Online at johnlewis.com
Printed Tote Handbag
If you want to see more of Orla's fashion designs, here is her page on London Fashion week, which includes a video and downloadable lookbook.
What is your favourite item?

Saturday, 31 August 2013

My Fashion Designs: Summer

I am staring a series for 'Fashion Design' called 'My Fashion Designs' with my drawings of outfits I have designed. I am really excited about sharing some of my work here! 

For the past year I have enjoyed drawing in my Top Model book, which has the outlines of models in various poses drawn in lightly for you to draw onto. I have used these for the following designs.  I also have recently got some Glitter Pens and Skin and Hair Colour Pencils made by the brand which are good to use but not of great quality. 

The designs above was the first I ever did in this book, going for a cute sporty look. The first design features shorts, t-shirt and net tights. The second design is a t-shirt with chinos and a padded bag.

The deigns here are inspired by the maxi trend, and feature multiple fabric designs on each item. I had fun designing the accessories! 

I don't usually design things in this style, but I am pleased with the results, especially like the t-shirt print: the words 'All the things I want to say' surrounded by other letters. 

These outfits are inspired by bright, detailed prints combined with trendy shapes. The second outfit is a biker jacket, printed leggings, and sandals.


Beachwear! The first outfit is a mini beach dress with detailed bodice, and it is not see-through, I just wanted to show the bikini underneath! The second is a tankini top and shorts with flip flops.

I hope you liked seeing my designs, what ones are your favourites?

Monday, 26 August 2013

Leaf Printing

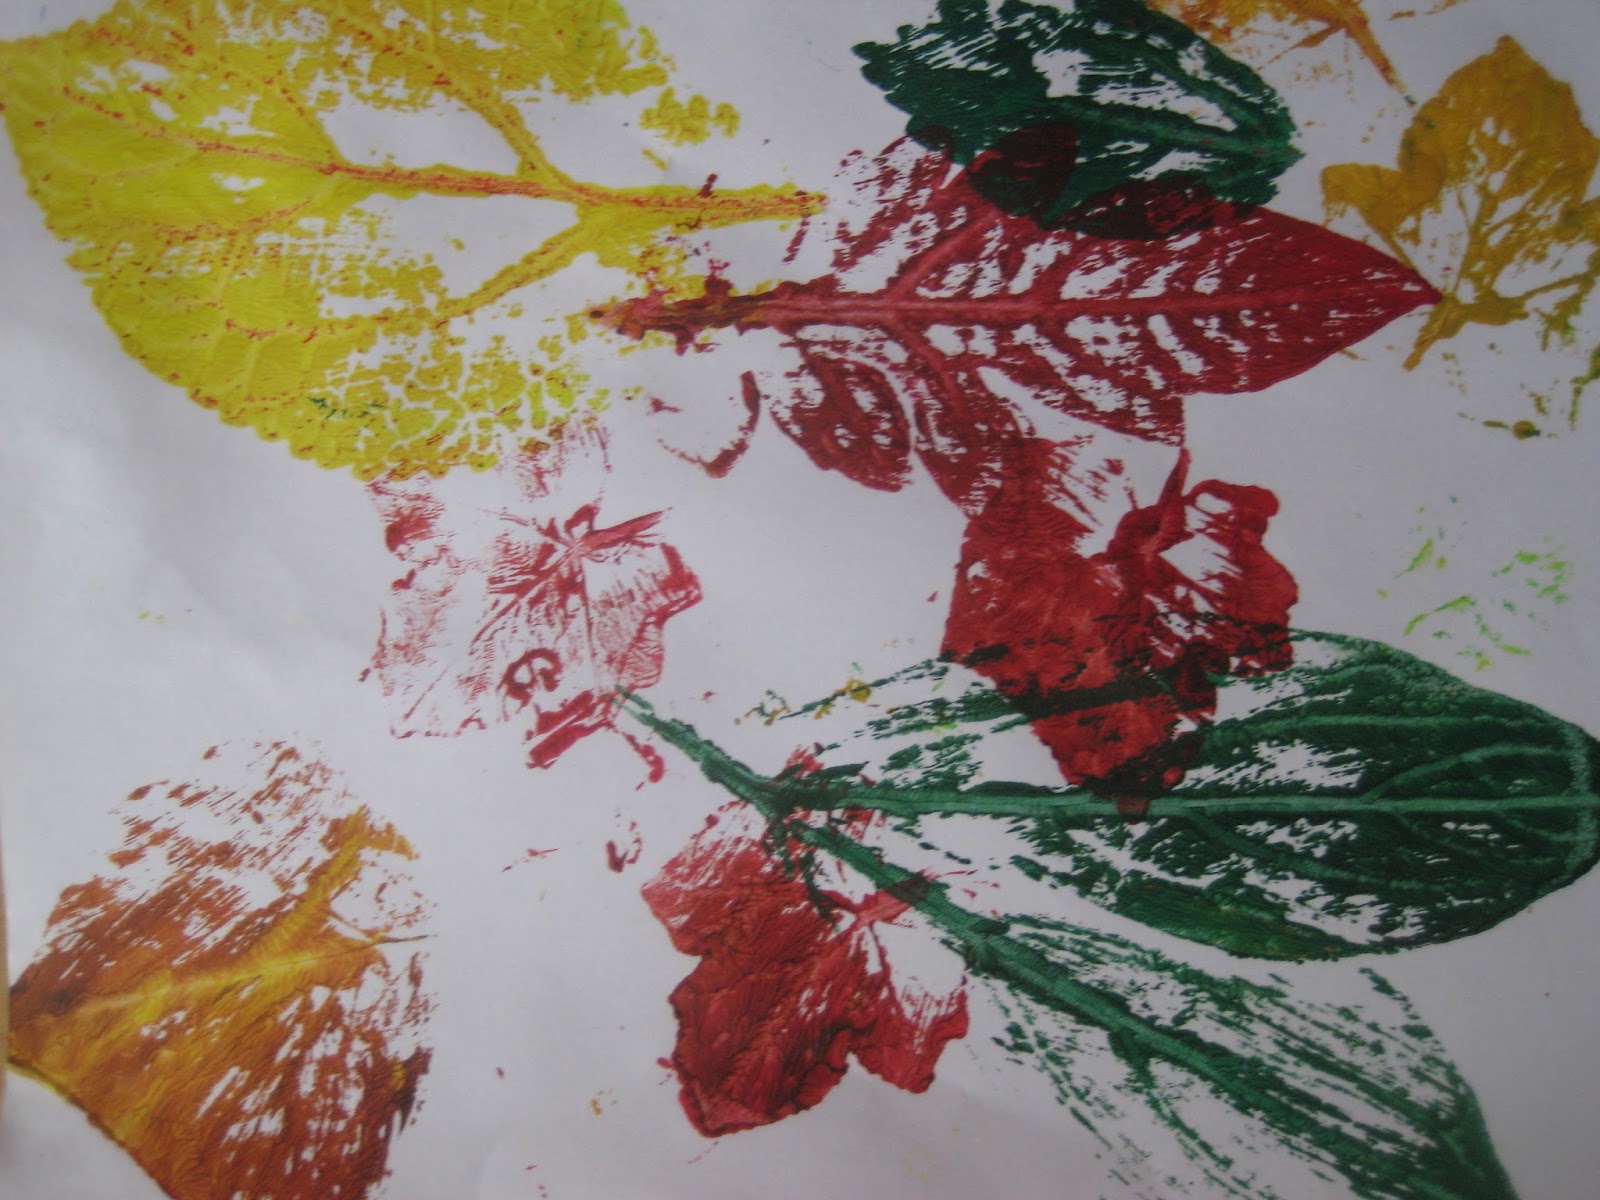
Before Autumn comes and all the leaves die, use them to make some lovely art! Leaf printing uses paint to make a print of the leaf onto paper, and showing all the small detials like veins and the texture of it’s surface. You will be able to find a large variety of leaves in your garden, the park, even on your street!


You will need:
Something to protect your worksurface (newspaper or bin liners)
A tray or sink filled with shallow water 
Tea towels
Acrylic paints and medium paint brushes
Paint pallette (you can use a sheet of cardbord instead)
Lots of different leaves
Some sheets of paper for the extra paint
Card or heavy paper for printing surface
Roller or plastic rolling pin


Use a varitey of leaves

• Cover your worksurface and lay out your supplies.


• Breifly soak the card or heavy paper in water, then bring it out a lay it on a tea towel. You want it to be only damp when you print on it, or the colours will run.


The leaf on the right was printed when the paper was still wet.

• Squeeze small amounts of coloured paint onto your palete or a piece of cardboard.


• Apply a thin coating of paint to a leaf using the brush. 


• Press the leaf down onto the spare piece of paper. If you have a roller it is better to use that for even pressure.


• Peel away the leaf, holding the stem. Press the leaf down onto the damp card and if you have a roller, roll it over in one direction a few times so that you get a lot of detail.


The first leaf prints

• Peel away the leaf, holding the stem. Do you like the print? Remember, practice makes perfect, and you will soon learn the right amount of paint and pressure to apply. 

• Keep printing more leaves in different colours onto your card to create a leaf collage! You can stick your dried leaf prints to the front of cards or on bookmarks too.

• When you are done clear everything away and wash the paint off your brushes, palette and roller.