Saturday, 31 August 2013

My Fashion Designs: Summer

I am staring a series for 'Fashion Design' called 'My Fashion Designs' with my drawings of outfits I have designed. I am really excited about sharing some of my work here! 

For the past year I have enjoyed drawing in my Top Model book, which has the outlines of models in various poses drawn in lightly for you to draw onto. I have used these for the following designs.  I also have recently got some Glitter Pens and Skin and Hair Colour Pencils made by the brand which are good to use but not of great quality. 

The designs above was the first I ever did in this book, going for a cute sporty look. The first design features shorts, t-shirt and net tights. The second design is a t-shirt with chinos and a padded bag.

The deigns here are inspired by the maxi trend, and feature multiple fabric designs on each item. I had fun designing the accessories! 

I don't usually design things in this style, but I am pleased with the results, especially like the t-shirt print: the words 'All the things I want to say' surrounded by other letters. 

These outfits are inspired by bright, detailed prints combined with trendy shapes. The second outfit is a biker jacket, printed leggings, and sandals.


Beachwear! The first outfit is a mini beach dress with detailed bodice, and it is not see-through, I just wanted to show the bikini underneath! The second is a tankini top and shorts with flip flops.

I hope you liked seeing my designs, what ones are your favourites?

Thursday, 29 August 2013

Voyage on the Great Titanic

I've always loved the 'My Story' series. The books are written as the imagined diaries of girls and boys at different times in history. 'Voyage on the Great Titanic' is the diary of the Margaret Anne Brady, written by Ellen Emerson White. I have read it twice on my own, and once aloud to my sister. The fictional Margret 'writes' well, describing the Titanic, the people and the events of the journey in a pleasant and witty way. It is wonderful read that really involves you in the story, not sparing any detail or description so that you get a real feel of what is going on.
It is 1912 and Margret is a London orphan who lives in a convent. She gets a job assisting a rich American woman as she travels from London to New York on the greatest ship ever built, the Titanic.
When the journey ends in the famous disaster, Margret has to leave a friend behind. What will happen to Robert? The story has a slight romantic twist and lots of excitement. Margaret is one of the small amount to survive that fateful night, when more than 1,500 people died. As the Historical Note says:
'The night the Titanic sank was one of darkness and courage, nobility and despair. For the most part, the very best of humanity was on display- with the very worst of results. It was a night that will never be forgotten.' 
The back includes a helpful timeline and interesting facts on the Titanic. You can buy it here on amazon.

Monday, 26 August 2013

Leaf Printing

Before Autumn comes and all the leaves die, use them to make some lovely art! Leaf printing uses paint to make a print of the leaf onto paper, and showing all the small detials like veins and the texture of it’s surface. You will be able to find a large variety of leaves in your garden, the park, even on your street!


You will need:
Something to protect your worksurface (newspaper or bin liners)
A tray or sink filled with shallow water 
Tea towels
Acrylic paints and medium paint brushes
Paint pallette (you can use a sheet of cardbord instead)
Lots of different leaves
Some sheets of paper for the extra paint
Card or heavy paper for printing surface
Roller or plastic rolling pin


Use a varitey of leaves

• Cover your worksurface and lay out your supplies.


• Breifly soak the card or heavy paper in water, then bring it out a lay it on a tea towel. You want it to be only damp when you print on it, or the colours will run.


The leaf on the right was printed when the paper was still wet.

• Squeeze small amounts of coloured paint onto your palete or a piece of cardboard.


• Apply a thin coating of paint to a leaf using the brush. 


• Press the leaf down onto the spare piece of paper. If you have a roller it is better to use that for even pressure.


• Peel away the leaf, holding the stem. Press the leaf down onto the damp card and if you have a roller, roll it over in one direction a few times so that you get a lot of detail.


The first leaf prints

• Peel away the leaf, holding the stem. Do you like the print? Remember, practice makes perfect, and you will soon learn the right amount of paint and pressure to apply. 

• Keep printing more leaves in different colours onto your card to create a leaf collage! You can stick your dried leaf prints to the front of cards or on bookmarks too.

• When you are done clear everything away and wash the paint off your brushes, palette and roller.


Thursday, 22 August 2013

Chocolate Tiffin


This is delicious. It just is. And it has so much flavour: from smokey roasted pistachio and almond nuts to sparky ginger biscuits and intense chocolate. And it has crunchy and smooth texture too. It is great to make ahead and take to buffet's or parties and it gets snapped up quickly!  Because, did I mention, this is really good!


Chocolate Tiffin 
From Green & Blacks Ultimate Chocolate Cookbook

90g whole blanched almonds
90g whole blanched pistachios
200g unsalted butter
140g golden syrup
400g ginger biscuits
70g good quality cocoa powder
80g sultanas
320g milk chocolate

  Preheat the oven to 180C. Gently roast the nuts for about five minutes on a baking tray for 5 minutes until they are just changing colour. Turn out the oven. 
  Line a 25cm square baking tin with greaseproof paper. Melt the butter and syrup together in a pan.
  Crush the biscuits in a large bowl. Mix in the cocoa, nuts and sultanas until well combined. Add the melted ingredients to the bowl and mix well. Press into the prepared tin. Chill in the fridge for 1 1/2 hours.
  Melt the chocolate in the microwave or in a glass bowl over a pan of boiling water. Spread the chocolate smoothly over the chilled base. Leave to set.
  Cut into squares and enjoy! 
This can keep for up to 10 days in an airtight tin. Makes 25 squares.


Tuesday, 20 August 2013

Card Making

It's funny how the 14 things are turning out... when I started I would have expected to write less on inspiration and food than art and craft, but no, it's the other way around! And then now, I've suddenly realised that I at the moment have only got 13 labels up there. What did I miss? It's card making.
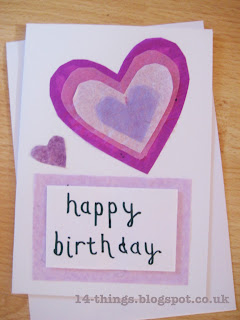
I'm wondering why that is. I go through card-making sprees, and I just haven't had one recently. And cards are quite hard (for me) to photograph. And I don't want anyone to copy my designs! I work very hard on said designs, and I never really make two cards the same. My style is lots of paper or tissue paper cuttings, layered up with a handwritten message (which sometimes smudges.) So now I've taken photos of my cards, labeled them with my blog address (as with the bible posters) for you to take inspiration from!


I save up tissue paper I'm given like a small animal hoarding food, so many of my designs feature it, mainly in heart shapes. However I have to be careful I use a glue that won't show through once it dries or break the tissue when you apply it. 


My papers are mostly from The Paper Stack, a big book from Crafter's Weekly. The one below was inspired by the garden themed papers section, all so cute and lovely! 


The bird cage design above uses a variety of prints of paper, my theme was one floral/antique paper bird cage and one modern pattern bird cage per row. The designs below use fabric glued to card, which is tricky to get looking straight, but produces a nice effect. I covered my '6' which was made from plain white card with glue then sprinkled over glitter. 


What card is your favourite? I hope you've been inspired in your card making! 

Saturday, 17 August 2013

I ♥ Chevrons!

I have been looking around online fabric shops for striped fabrics for a project I'm considering at the moment. I do like browsing around all the covetable loveliness stocked online, it's so inspiring! I do find prices a bit higher than local fabric stores, though. My only issue with online shopping for fabrics is how I can't be sure of the thickness of the fabric. I can picture jersey or felt but something like cotton can vary in weight.

Zig Zag – Storm Grey

I have always liked pale stripes and little spots, but when I saw the bold coloured zig-zags I was surprised at how much I like them! Of course, I've seen chevrons before, but never been that taken with them. I especially like to match the plain grey chevrons with brighter colours in my mind, so I can imagine a contrast pocket or something similar.
I haven't brought anything yet, so can't recommend the fabric or it's weight, but from a design point of view, here are some favourites!


The above grey fabrics are from Fabric Rehab, which stocks a great varitey of fabrics, many gorgeous prints. Browsing here was where I first came across my love for chevron! I like the differentness of the greys, it would be interesting to buy both, just for comparison.

Medium Chevron – Green

Most of the featured fabrics are 'medium chevron' from Riley Blake. I like the simplicity and scale of the zig-zags.

medium chevron yellow - riley blake flannel
The other fabrics shown here, including the yellow above, are from the eternal maker. Again, a lovely shop with a wide variety. They sell beautiful japanese fabrics, which are quirky, fun, and and very detailed prints.

medium chevron aqua - riley blake flannel
I just love the bright colour here! Bright solids are great for chevron because the white background can support it so it doesn't look way too full on!

I like the use of three colours here, which has a great effect, especially as the colours are muted slightly.

Sweetwater- Zig Zag Stripe
Look out for more chevron inspiration! Finally, here are a few questions for you. (At the end because if you've read the post then you will probably want to answer!) 
Do you like these fabrics? What online fabric shops do you like?

Thursday, 15 August 2013

Fabric Covered Notebook

I have been making these notebooks as gifts for a while now. This is a project I always return to: it's quick to make, looks cute, a gift to suit anyone, the supplies are easily available to me and I can send it in the post. So, now I'm sure you're dying to see how it's made ; P here's a tutorial!


First, you'll need this stuff:

a blank white A6 card
A piece of fabric about 2" larger (on all sides) than your card
3-5 pieces of A4 paper
Sewing machine
Long arm stapler (I'll talk about alternatives later)

Iron the fabric and cut to size, using the card as a guide. Fold the edges into a hem, by folding each fabric edge up to the edge of the card, and then folding both layers over the bottom of the card. Fold 2 opposite sides first.

Now sew along the edge of the card to secure the 2 sides. Fold the other 2 edges and sew,  trying to meet the ends of your other sewing. 
Sew around the edge of the whole card in a continuos line, with the front facing up as you sew. Fold the card along the fold line.
So, all you have to do now is secure the paper into the notepad. Cut each piece of paper in half, then fold in half. When choosing how many pieces of paper to include, remember, each piece of A4 paper makes 4 pages. I would recommend having no more than 20 pages. 
Put the papers into your cover, and you will see that the ends of the paper stick out further than the cover. You can choose to ignore this, or carefully trim the edges down to fit the cover.
Last thing to do is staple in the pages with 2 staples along the spine of the book. Staple from the top of the book so that the sharp ends are hidden inside. You could sew in the pages rather than stapling, but you'll probably have to use less paper to make it go through the machine!


Variations
You can use only coloured card for the cover instead of covering it with fabric. 
You can cover your pad in two fabrics by cutting each piece of fabric to half the size of the notepad, plus the 2" hem. Lay the fabrics, right sides together, and sew along one long edge. Iron the seam open and use as in the instructions. 
Decorate the cover by appliquéing on other fabric shapes before using to cover the notebook.


Tuesday, 13 August 2013

Life {Tuesday 13}

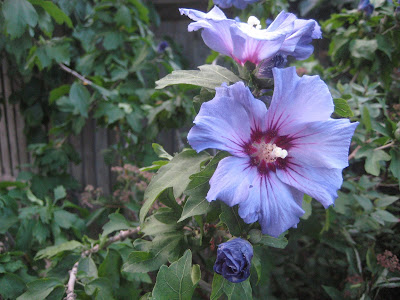
In the garden...


we have flowers...


and sunflowers... 


plums on the tree...


and a variety of other growth.


In the house we have..


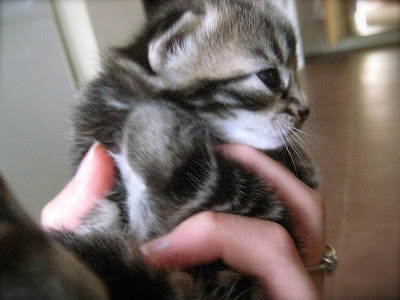
kittens! 


They are just so small they fit in your hand.

Sunday, 11 August 2013

Bible Posters 3- I love Jesus

One of the things I love to design are posters of bible verses. I have been working on creating digital copies of some of these lately. As the first series on my blog, I am going to show these, one at a time, on Sundays on the blog. I hope you like them. At the moment I want all my posters to stay here on my blog, so I have labeled them with my blog address. 


I love Jesus because He...
I was inspired to make this poster because I love Jesus! I was thinking of some of the reasons and realised that I will never be able to list them all. This is why I should love him, but more why I do love him. These are some of the things I thank him for. These are not necessarily my 'top 10' or the best reasons for loving him, but what came to mind at the time.

Here are verses from the Bible realted to the things I listed:
{Created Me-Genesis 1:1} {Loves Me-Romans 8:39} {Died for Me-Romans 5:6} {Saved Me-Acts 15:11} {Forgives Me-Ephesians 1:7} {Blesses Me-Ephesians 1:3} {Listens to me-Psalm 66:19} {Prepares a place for me-John 14:3} {Intercedes for Me-Hebrews 7:25

Unlike the previous posters shown, this one was deigned only on the computer, using two fonts: 'Handwriting - Dakota' and 'Prestige Elite Std.' I drew the hearts and made the cross out of lines.

Saturday, 10 August 2013

Mustang, Wild Sprit of the West by Marguerite Henry

This book is one that has captivated me since when I read the first chapter a couple of years ago. I have read it probably three time more since then, twice after having received it for my birthday (upon request.) It is my personal favourite out of all the Marguerite Henry books I've read, next in line being 'King of the Wind.' I was surprised to see that these are quite rare books!

One of the reasons I have been gripped by this book is that, especially when I was going through a 'horse-mad' phase, it was about mustangs, which I hadn't heard much about. It is written from the point of Annie, who later in the story is named 'Wild Horse Annie,' who has always had a special bond with mustangs. She tells her life story, living on a ranch on Nevada and growing up with horses. Some parts shine with happiness and some parts are so sad, I cried when I first read them.
When Annie grows up and marries Charlie, who helped on the ranch, they buy the ranch and work hard to keep it. But one day Annie finds out about the round-up and slaughter of wild mustangs to be made into canned dog food. Along with others, Annie starts to fight against these cruel practices, eventually making her way to Washington to protect all mustangs and keep them roaming free.

There are also lovely illustrations which are done in ink, I think. The book has over 200 pages.

This book can be brought from amazon sellers or from Alibris.

Thursday, 8 August 2013

Pirate Cake

I was shown this as an inspiration for the birthday cake I was going to make for my 6 year old brother. He wanted a pirate themed cake and liked the look of this one. So did I as it looks really fun and is covered in sweets and icing!
Pirate Cake from Betty Crocker Recipes
The recipe was on the Betty Crocker sight to used their boxed cake mix and ready made butter icing. I made the cake and icing myself and modified the variety of sweets used. The cake and icing recipes are on this post.


To Assemble the Pirate Cake
The following instructions were taken and edited from the Betty Crocker website.
About 2  double fruit winders or other for red stripes
1 pack strawberry (or other reddish fruit) laces
1 marshmallow
1 miniature blue chocolate bean/smartie
Chocolate disk for eye patch
Chocolate flavour sugar strands
Print out the template from here and cut the cake out as it says.
Cover a large board with foil or use a 16"rectangular cake board. First ice the body using the white icing. Be careful not to get crumbs in the icing so lay on a lot and spread it out with a small palette knife. Lay it at the bottom of the board.
Next ice the head using the skin tone icing, stick on the ears and ice over them too. Then ice the nose, stick it on the face a smooth the icing down so it sticks. Place on the tray above the body.
Spread the chocolate icing over the hat shape. This is a bit stiffer than the others so a bit tricky! You can dip the palette knife in hot water to smooth over the icing when you've got it on.
Now decorate! Lay strips of the fruit winders over the body and cut to size. Use twisted laces for the mouth, hat band, earring and eye patch band. Stick on the chocolate disk for the eye patch with a little icing. Cut the marshmallow in half and stick on the chocolate bean for the eye. Sprinkle over chocolate strands for stubble, using a little more icing to stick on.
Everyone will enjoy the delicious cake!


What would you have as your themed birthday cake?

Tuesday, 6 August 2013

Chocolate Cake and Icing

I recently made this pirate birthday cake for my little brother, taken from here. I was going to add the recipe and cake and icing info in one post, but it was so loooong that I am posting the cake and icing recipes first.


I have been using this cake recipe for a while as it is easy to make and produces a nice moist cake. This recipe has directions for making two cakes: a 9" and an 8", which are used for the Pirate Cake. If you put the mixture into muffin cases you will get 24 cupcakes which are delicious served warm topped with icing sugar. This is doubled from a recipe to make one 8" round birthday cake so you can also make to 8" cakes which can be sandwiched with the white buttercream icing.
There are three icing tones: white, skin tone and chocolate, which are made from a batch of white icing and a batch of chocolate icing.

Chocolate birthday cakes
Makes one 8" and one 9" cake, enough for the Pirate Cake
250g butter, softened
2 tsp vanilla extract
440g (2 cups) caster sugar
4 eggs
160ml (1+1/3 cup) water
400g (2+2/3 cup) self-raising flour
100g (1 cup) cocoa powder
Preheat the oven to 180C. Grease one 8" and one 9" round springform tin and line the bottoms with greaseproof paper. 
Combine the butter, vanilla, sugar, eggs, water, flour and cocoa powder in a bowl with an electric mixer until combined. Then turn up the speed to medium and beat for 4 minutes until the mixture is smooth, paler in colour and has increased volume. The change over this beating time is really cool to watch!
Ladle the mixture into the pans, trying to make sure that they have the same depth of mixture. Don't worry about being too exact, mine were different and I liked the effect! 
Bake until a cake tester or skewer comes out clean. This took mine about 35 minutes, but may take up to an hour. Leave to cool for a while in the pan and then release the sides of the tin for it to cool further.
Store in an airtight cake box until using.

White Buttercream Icing
250g icing sugar, sifted
80g unsalted butter, at room temp.
25ml milk
few drops vanilla extract
Beat the icing sugar and butter together, using a electric mixer or food processor. I add the icing sugar in 50g bits. Then add the milk and vanilla and mix until fluffy and light on a high speed for a while.
Set aside ready to use some for the skin tone icing.

Chocolate and Skin tone Buttercream Icing
250g icing sugar, sifted
80g unsalted butter, at room temp.
25ml milk
100g dark chocolate
Mix the icing together as in instructions above, then melt the chocolate, in the microwave, 30 seconds at a time. Add a small amount to the icing and beat until incorporated. This should produce a light brown.
Transfer a third of the mix to a separate container and mix in a third of the white icing to produce a light skin tone.
Stir up the rest of the chocolate and add to the remaining icing in the mixer. Turn on to a high speed and mix it all in to form a dark brown. Mix until soft and smooth. This will be a little firmer in texture to the other icing.

The fun decoration part is in this post!

Sunday, 4 August 2013

Bible Posters 2-1 Timothy 1:15

One of the things I love to design are posters of bible verses. I have been working on creating digital copies of some of these lately. As the first series on my blog, I am going to show these, one at a time, on Sundays on the blog. I hope you like them. At the moment I want all my posters to stay here on my blog, so I have labeled them with my blog address. 


A MESSAGE, a big message! listen up, it is Worthy of all Acceptance.
CHRIST JESUS came into the WORLD to SAVE SINNERS!

A Big Message

I drew this Bible poster while listening to a sermon on 1 Timothy 1:15, which I've got on my sidebar. The verse is about the gospel message, Jesus coming to save sinners. 'This is a faithful saying and worthy of all acceptance, that Christ Jesus came into the world to save sinners, of whom I am chief.'

Paul, who wrote this verse, knows how big the message of the gospel is! It is time to listen up. It is worthy of all acceptance: it deserves your trust. Christ Jesus came into the world to die for the sin of all. 'All have sinned' Romans 3:23. Paul says that he is the 'chief of sinners:' the worst. 


I swapped the colours around to give a chalkboard effect. The text uses a chalkboard effect, but when I drew it the letters were bold and chunky, as in 'sinners,' with a striped background. So it is different from the original (none of mine look that good scanned straight in) but it still emphasises the message. 

Saturday, 3 August 2013

Summer Fashion Inspiration: Dresses

As an aspiring fashion designer I'm always really excited when summer comes and I get to shop for lovely new clothes! I've been really inspired by all I've seen to create a few outfits with clothes from various online shops. Here are my picks! Click on the text to go to the item's page. Just to note that I am not trying to advertise any particular shops here, these are just the ones known to me that sell stuff I like! 
My two outfits here are based around summer dresses, which can be casual or dressed up. I have then added shoes and accessorise on a theme to go with the dress. Imagine the further possibilities for these dresses, you could use a whole new set of accessorise I'm sure!

Lace Dress-Dorothy Perkins : Earings-New Look
Sandals-Accessorize : Flower-Accessorize : Ring-Accessorize  
The one above was probably the easiest to source items for. The outfit is light and pretty but looks comfortable too.
Bow Dress-Dorothy Perkins : Umbrella-M&S : Hair Bow-Claire's
Clutch Bag-Accessorize : Shoes-New Look

I have the black dress and it is a lovely fit for me and in a nice comfortable jersey kind of fabric. I normally wear this casually but have chosen more dressy accessories.

What dresses are you liking online? 

Thursday, 1 August 2013

Recipe Book


As a lovely gift I received a beautiful blank recipe book which is from Sainsbury's. I've just got round to organising it and writing in it. There are 4 sections, which I have used as: 'Snacks, Salads & Starters,' 'Main Meals,' 'Deserts,' and 'Baking. I thought I'd share a bit of a mish-mash of what I have been adding to it.  I have got my version of nachos in the book, but I couldn't find a similar recipe online. It is written out at the bottom of the post. And a mozzarella, tomato and basil salad which I will write out too.In the Main Meals section I have these Turkey Burgers from Tesco Real Food. They are a really good summer main with great flavour. I made the guacamole from the recipe but didn't like it so haven't added that.I also put Lamb Koftas in, which my sister and I have served as a meal for my parents and their friends, who said they were lovely. We served them with cous-cous, wraps and the tomato salad from the recipe, which I have added to the Salads section. We also made a cucumber mint raita to go with the meal. The recipe is at the bottom of the post.For Deserts I added No-Churn Salted Caramel Ice Cream, which I have not made but have eaten and it is truly amazing! And this quick Banoffee Pie from the Carnation Caramel website.

So, my recipe for Nachos! This fills up our large stone baking tray, so it makes enough for a large family starter or snack.
1 bag of plain Tortilla chips
150g (roughly) cheese, grated
1/2 red pepper, cut into strips
Chili powder and/or paprika
Preheat the grill to medium/high. Lay the tortilla chips out on a large baking tray. I use a stoneware tray. Try to make them evenly spread out. Cut the pepper and sprinkle over. Grate the cheese and sprinkle evenly over the crisps. You want to cover all of the chips so you may need more. Next sprinkle over some chili powder or paprika. You're probably getting good at the sprinkling action here! Grill until browned and the cheese is bubbling. Enjoy!

Mozzarella, Tomato and Basil Salad
1 large tomato
1 ball mozzarella cheese
A few basil leaves
Olive oil
Salt and Pepper
Slice the tomato and mozzarella cheese and layer on a plate. Sprinkle over the basil leaves and drizzle over the olive oil, and add a twist salt and pepper

Cucumber and Mint Raita
1/3 cucumber
2 tablespoons yogurt
A few mint leaves
Grate the cucumber. Squeeze out the liquid in a paper towel. Stir in the yogurt, tablespoon at a time to make a fairly thick mixture. Finely chop/shred the mint leaves and mix into the yogurt and cucumber. Enjoy as a cooling side to spicy food!

I'll post any extra good recipes I find later!